Monday, February 28, 2011

Roasted Tilapia with Tomatoes and Olives


Super fast to prepare. Super easy to make. Super delicious to eat.

Am I sounding like a broken record? I think I start a lot of my recipes with similar descriptions, but busy life calls for fast and easy meal preparation and delicious is non-negotiable. If it's not delicious, I don't make it again and I'm certainly not going to post it for you.

Roasted Tilapia with Tomatoes and Olives
adapted from Cooking Light
  • 1 lb tilapia fillets, probably about 3-4 fillets, depending on their size
  • ¼ tsp salt
  • ¼ tsp pepper
  • 1 (10-14 oz) can of diced tomatoes with green chilies
  • ¾ cup chopped Kalamata olives, or black olives **see side note below**
  • 3 Tbsp chopped fresh flat-leaf parsley
  • 3 garlic cloves, minced
Combine the tomatoes, olives, parsley and garlic in a bowl and mix to combine.

Sprinkle fish with salt and pepper. Coat a rimmed baking sheet with cooking spray and place fish on sheet. Pour the tomato mixture around the fish.


Bake in a preheated oven at 375 degrees for 20 minutes or until fish flakes easily with a fork. Serve with the tomato mixture on top of the fish.

Side note: I made this dish with Kalamata olives from the olive bar at our grocery store. The price for those olives ranges from $5.99-$7.49/lb. That might scare some of you away, but I only bought what I needed and I paid less than $2 with a few left over to munch on. We feel it is worth it. The briny olives taste so much better than olives from a can. Try it once and see what you think, you can always go back to the can, but I bet you'll be a convert too!

I served the fish with roasted asparagus. Enjoy!

Print recipe for Roasted Tilapia with Tomatoes and Olives

Thanks for reading. If you would like to receive FREE updates of FBS, there are four ways to do so:

This recipe is linked to:

Saturday, February 26, 2011

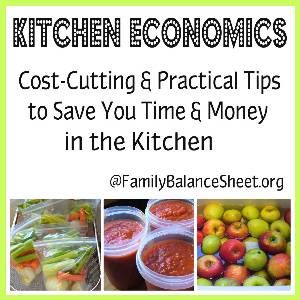
Kitchen Economics ~ A New Carnival


A new carnival is coming to town, Kitchen Economics ~ Cost Cutting Tips to Save You Money in the Kitchen. Every week, I'll share a kitchen tip that saves my family money in the kitchen. I'll invite bloggers to submit a link to their money saving posts and invite readers to include their tips in the comment section.

If you haven't heard, food and grocery prices are expected to rise over the next few months. My goal is to always save my family money, but not sacrifice the quality of food that we eat. That is sometimes a challenge, but it's a worthy one.

So please join me here on Wednesdays, with your money-saving tips and recipes, for Kitchen Economics. Let's inspire each other to keep the quality, but reduce the price.

The first link-up will be Wednesday, March 2. Looking forward to seeing you here!

Thanks for reading. If you would like to receive FREE updates of FBS, there are four ways to do so:

Thursday, February 24, 2011

Now I Remember Why I Don't Go To The Mall

I stopped by the mall yesterday to return something that I bought online at Gap. I was able to return the item at the store and the mall is very close to my daughter's pre-school, so not out of my way.

As I was walking in the mall with both of my kids I was trying to remember the last time I was even there. I think it was last August when I was shopping for school clothes for my 5 year old.

It is a pretty basic mall with Macy's, Sears and JC Penney as the anchor stores and then Gap, Limited Brands, Children's Place and others fill it in. I just don't have much of a need to go there very often.

As I was walking down the mall towards the exit, a woman jumped out at me from her kiosk where she was selling hand lotions. I politely said "no thank you" and she said "it will just take one minute" as she grabbed my hand and pulled me in. In no time she was buffing my finger nails and slathering cream on my hands all while offering my kids a piece of candy to keep them entertained.

"Don't you just love the feel of your hands now", she asked, placing a bag of products in my hands. "It is valued at $79.99, but today I give it to you for $39.99".

WOW, how can I refuse that bargain?, I thought sarcastically. But instead I politely declined. "But you like the products. Why wouldn't you buy them?" she responded.

Now my patience was really wearing thin. I had let this go on too long. I should have stood my ground at the very beginning and not waste her time or mine, but she was being very pushy and aggressive with me and I was done.

"I'm not here to buy hand cream. I just had to do a return. I don't have any money with me today and I'm sorry, but I'm not interested", I said. Just then, my kids who were being extremely patient and good, but of course they were given candy in the beginning, came up to me with very messy hands. The chocolate candy the lady had given them was more appealing to play with than to eat and their hands were a chocolaty mess. Good save, girls. This is one time I'm not upset that you made a mess. As I turned my attention to my kids, I grabbed some wipes out of my bag and we walked/ran away.

This sales person was very aggressive with me and didn't take "no, thanks" as an answer. My husband thinks I should call the mall and complain, but I'm over it and NOW I remember why I don't go to the mall!


Thanks for reading. If you would like to receive FREE updates of FBS, there are four ways to do so:

Tuesday, February 22, 2011

Emergency Funds: Emergencies Happen When You Least Expect It


The year 2007 held such promise for us when it started, but by the end of the year we were brought to our knees.

As self-employed owners of a small business, we have lived through some tough months, but in 2007, it was a tough year. For a variety of reasons, our business became difficult that year. There were months when our sales were HALF of what we would normally bring in. Our monthly income must cover our business and household expenses and many months in 2007, our income barely covered our business expenses leaving nothing left for our household.

I remember one morning my husband and I were sitting at the kitchen table contemplating if we should sell one of our cars. It was a scary time for us.

What got us through...our emergency fund.
Had it not been for the money in our emergency savings, we would most likely have used credit cards to survive. We reduced our spending where we could, but the money to pay any shortfall each month came from our emergency fund. It was a life saver, a sanity saver and a marriage saver.

By the end of 2007, our business was picking up again and we were gaining some momentum, but not before we practically wiped out our emergency fund with only $2000 left to spare, not enough to get us through one more month.

We spent the next couple of years building our savings back up, but I am now thinking that it needs to be increased.

How Much Do You Need in an Emergency Fund?
Three months of living expenses? Six months? One year? Depending on our income source and stability and what we are comfortable with, that number might be different for everyone. Three to six months living expenses used to be what the personal finance experts recommended, but in today's environment, maybe six months to a year is more prudent. In 2007, we used about 6 months worth of living expenses and our savings came very close to drying up, so saving one year's worth of living expenses might be more wise for us.

What is considered an emergency?
Surely unemployment, reduced income or a business downturn is considered an emergency, but so is a leaking roof, a broken hot water heater, or a dead car battery. But a broken TV or the snazziest new phone or gadget...maybe not so much. An emergency fund is really a necessity account. Your wants and dreams are secondary and need to be saved for separately.

Should you impose strict rules on emergency fund spending?
Absolutely! Don't confuse this money with vacation money or new furniture money. It is not a spending account. It is for emergencies. Save it and forget about it.

Which comes first: saving for an emergency OR paying off debt?
Many personal finance experts believe in building an emergency fund to $1000 to get started and then pay off consumer debt. Once that debt is paid off then start building up you emergency fund to your desired number. I like this strategy, but I personally don't think $1000 is enough to start with. We spent that in one week last fall when our hot water heater suddenly broke and one of our vehicles needed four new tires to pass inspection. I think $2000-$3000 will give you more of a cushion to start with and less of a chance that you'll need to resort to a credit card or loan when a disaster strikes.

What happens when you have an emergency?
Take a deep breath, because with a well-funded emergency savings account, you're covered. BUT make it a priority to replenish the account as soon as you get your feet back on the ground.

Do you have an emergency fund? Is it enough to cover your emergency needs? Are you having a hard time saving for your emergencies? Let us know in the comments.

Thanks for reading. If you would like to receive FREE updates of FBS, there are four ways to do so:

This post is linked to Frgual Friday at Life as MOM.

Monday, February 21, 2011

Banana Oatmeal Muffins


If you have over-ripe bananas that no one wants to touch, this is a great recipe to make and have for those 'grab-n-go' mornings. You know those mornings, where you need to eat something, but there is no time to make breakfast for yourself or your family.

This is also a great freezer recipe.

Banana Oatmeal Muffins
adapted from Cooking Light
  • 1 ½ cups flour
  • ⅔ cup sugar
  • 1 ½ tsp baking powder
  • ¼ baking soda
  • ¼ tsp salt
  • ¾ regular oats
  • 1 cup mashed ripe bananas - about 2-3
  • ⅓ cup buttermilk (don’t have buttermilk - add 1 tsp white vinegar to ⅓ cup regular milk, I use 2%, and let the milk sit for a few minutes)
  • ¼ cup vegetable oil
  • 1 tsp vanilla extract
  • 2 large eggs, lightly beaten
  • ½ cup chopped pecans or walnuts, optional
  • cooking spray

In a large bowl, combine the dry ingredients: flour, sugar, baking powder, baking soda, salt, and oats. Stir with a spoon or wisk to mix together.

In a separate bowl, combine the bananas, milk, oil, vanilla extract and eggs. Add the dry ingredients. Stir until just moist.

Pour batter into a 12-muffin pan that has been coated with cooking spray. If desired, sprinkle muffin batter with the nuts.

Bake in a preheated 350 degree oven for 25 minutes or when a toothpick inserted in the center of a muffin comes out clean. Cool slightly in pan on wire rack. Remove from pan and cool completely on wire rack.

Makes 12 muffins.

Print recipe for Banana Oatmeal Muffins.

Thanks for reading. If you would like to receive FREE updates of FBS, there are four ways to do so:


This post is linked to:

Thursday, February 17, 2011

Freezing Cookie Dough: Frugal Tip or Portion Control


I have a bit of a problem with sugar. My husband wants me to admit that it is an addiction, but I'm not ready to go that far. I like dessert. I like sweet things. But don't come near with sugar replacement products. I don't do artificial, nor sugar-free. I do sugar, pure and simple sugar, and I need to reduce my intake.

It is not prudent for me to bake an entire batch of cookies anymore, because they will be eaten in about 2 days. So just like my Brownie Muffins, I have been freezing cookie dough too. I just pull out a few at a time and the batch lasts us for several weeks.

After I prepare the batter, I scoop out the dough with an ice cream scoop and place on a cookie sheet. Stick the cookie sheet into the freezer and flash freeze for about 30 minutes. After flash freezing, stick the dough balls in a freezer bag and store in your freezer. When it is time to bake, I don't bother thawing, I just follow the cookie recipe for temperature and bake time or to our desired crispiness.

I have tamed the brownie dragon and now the cookie dragon. Now, how am I going to tame that pesky ice cream habit of mine?

Thanks for reading. If you would like to receive FREE updates of FBS, there are four ways to do so:

Wednesday, February 16, 2011

How To Save Money at Restaurants and Enjoy a Meal Out


When Friday night hits, I am a bit burned out from cooking all week, so we make a point to go out to dinner. However, dining out can take a bite out of the outgoing cash flow, so we are always looking for ways to save money and still enjoy a night out at a restaurant.

Eleven Tips to Save You Money at Restaurants
1. What is your favorite restaurant? Go to the websites of all your favorite restaurants and see if they have online coupons or specials on their sites. So simple, yet so effective.

2. Take advantage of mid-week specials. Our local pizza shop sells large cheese pizzas on Tuesdays for $6.99 vs. $14.99 the rest of the week.

3. Kids Eat Free promotions. Kids meals normally range from $3.99 - $5.99. But many restaurants offer free kids meals or reduced kids meals with an adult meal purchase during specific hours or days. For example, a favorite local Italian restaurant offers FREE kids meal with adult meal purchase on Saturdays from 2pm - 4pm. Make it easy on yourself, search Kids Meal Deals or Kids Eat FREE Deals in your area at Kids Meal Deals. I just signed up to receive their newsletter and it appears the restaurants are the national chains.

4. Eat FREE on your birthday. Sign up for Red Robin's e-newsletter and get a free burger on your birthday.

5. Go out for breakfast or lunch instead of dinner. These specials always seem to be so much cheaper.

5. Order an appetizer and share a main dish. Or just order appetizers instead of main dishes.

6. Avoid the soda pop. At $2 - $2.50, it is an expensive drink. Avoid not just for monetary reasons, but also for your health. Most restaurants offer free refills and the waitress just keeps pouring. By the time you leave, you might have had 3+ glasses of soda. For this reason alone, I have stopped ordering sodas at a restaurant, because I was so bloated on soda. I now order just water. If you must have a soda, buy a 2 liter at the grocery store for 79 cents and drink it at home.

7. Enter your zip code at Restaurant.com to see what area restaurants are offering deep discounts on gift certificates. You might be able to snag a $25 certificate for $10 or even cheaper!

8. Consider purchasing a Bonus or Entertainment book for your area. Order them online or look for the books at a local bookstore. The majority of the coupons are Buy 1 Get 1 FREE. We get one every year from my parents for Christmas. They make great gifts for people who are hard to buy for.

9. Do you receive a Coupon Clipper magazine in your mailbox? They are a great source for local restaurant coupons. We keep ours in the car, so we always have it with us. Also plug in your zip code at the Clipper site, DoubleTakeDeals for 50% off deals in your area.

10. Check your local newspaper for coupons. Find out when they run their dining guide. Ours runs on Thursdays and often times includes coupons.

11. Short on cash even with the coupons, save your change in a large jar and when it is full, cash it in for a non-guilty meal out.

What tips can you add to help save money at restaurants? Let us know in the comments.

Thanks for reading. If you would like to receive FREE updates of FBS, there are four ways to do so:

Image: bigjom / FreeDigitalPhotos.net

Monday, February 14, 2011

Artisan Bread in Five Minutes a Day: My Experience


Upon my request, my husband bought me Artisan Bread in Five Minutes a Day: The Discovery That Revolutionizes Home Baking for Christmas in 2009.


with the inscription...


and no, we are not 300 lbs...yet.

We love our fresh baked bread. Who doesn't?

Freshly baked and smothered with butter or hummus or strawberry jelly.


Right after Christmas 2009, I made a batch of this bread and it was tasty, but for some reason I put the book back on the shelf and actually forgot about it.
This past November in 2010, I was in the bakery at Wegmans looking for a good loaf of bread for a special dinner for my husband's birthday. The freshly baked breads looked and smelled heavenly, but they were $4.50...for one loaf of bread. I indulged and as we were eating the $4.50 loaf, I remembered the cook book and I have been making the Artisan bread ever since.

The book starts with the Master Recipe and step-by-step, precise instructions. This dough mixes up quickly, especially if you use the dough hook of your mixer. After the dough rises for a couple of hours on the counter, it is ready to use or you can refrigerate it for up to two weeks. One batch of the Master Recipe makes 4 loaves of fresh bread, or pizza, or any of the dozens of recipes that are included in the book. This master recipe is the starter to wonderful variations and recipes. This bread will have a crispy, crackling crust, but a tender, delicious inside. There is no kneading involved at any point. When you are ready to bake a loaf, you pull off a pound of the dough that is in your fridge, shape it into a loaf, let it rise for 20-40 minutes, depending on the age of the dough and bake. The "5 minutes" part is the active effort that it takes to make the bread, the shaping into a loaf.


I have been keeping a batch of the dough in my refrigerator ever since November. It was the reason I bought four 5-lb bags of flour during the holiday sales back in the December.

I take the full 2 weeks to use the dough. I usually make 2 loaves of bread and 2 pizzas with the dough. We enjoy a nice loaf with one meal a week. We have also been having a homemade pizza night every Saturday night.

There is a Master Recipe and then several variations of the master. Right now I make the Olive Oil Version as it works nicely with pizzas and my favorite bread, Olive Bread. I may or may not have a slight addiction to it. I am a lover of all things Kalamata.


The pizzas took me a few times to get used to, but now it is SO easy. I had never made pizza this way and I am hooked on the technique. Before, I just put my homemade pizza (with store bought crust...ahem) on the pizza stone and put it in the oven.

Now, the oven is preheated at 550 degrees F (500 if that is your oven's maximum) with the pizza stone already in the oven for 20 minutes. While the oven is preheating, I roll out the dough and then place on an upside down cookie sheet that is covered liberally with cornmeal. I then add my toppings. I don't have a pizza peel, which is recommended, but the cookie sheet has been working well for me.


After 20 minutes of preheating, with a quick shake I carefully slide the pizza on to the heated stone. The cornmeal makes this easy.


It bakes for 8-10 minutes and Viola: delicious, home baked pizza with a crispy crust. We all love it and I am going to start making different variations of pizzas. Per my kids' requests, our pizzas have all been cheese.


The cost savings for Artisan Bread in Five Minutes a Day:

The Master Recipe calls for 6 1/2 cups of flour. When I use the sale flour that I bought in December and when I buy the yeast on sale and with a coupon, I'll spend about $1 to make one batch of the Master Recipe. Remember that one batch of the Master Recipe makes 4 loaves of fresh bread, so the final price of a loaf is 25 cents! Also remember that I spent $4.50 on ONE loaf of fresh store-bought bread. The final price of the home-made bread will vary slightly depending on what you pay for your ingredients and it will go up when you add other ingredients like my beloved Kalamata olives, but the savings will always be substantial over the store-bought version.

Some supplies that you'll need for Artisan Bread in Five Minutes a Day:

1. A good pizza stone. The book suggests you get a high quality, half-inch thick baking stone. Apparently, the cheaper, thinner ones crack easily. Fortunately, I have had a stone from Pampered Chef for about 15 years and it is still going strong. You could use a baking sheet, but you won't get the crisp crust on your bread like you will with a stone. The stone absorbs the excess moisture from the wet dough and that is what creates the crackling, crisp crust.

2. Oven Thermometer. The book states that this item isn't optional, but I don't have one yet.

3. A 5-quart plastic storage container with a lid to store the dough in your refrigerator.

4. Boiler tray to hold the water for steam. I used the one that came with my oven. The stone is placed in the middle rack and a boiler tray is placed on the bottom rack. A cup of water is placed in the tray when the dough is put in the oven. The steaming helps get the crackling, crispy crust in a lot of the breads. This isn't needed for the pizza.

5. A pizza peel to slide the dough on to the hot stone. I don't have a peel and like I stated above, I use an upside down cookie sheet. This has worked fine for me, but I might eventually get a peel.

6. Scale. This isn't necessary, but I weigh my bread when I break off a piece. I found in the beginning that I was breaking off too big a piece and then it wasn't baking all the way through. I didn't realize it until I cut through the loaf....GRRRRR. I use a simple kitchen scale that I have had for years. Eventually, I'm sure I'll be able to eyeball the dough that I am breaking off, but right now I do weigh it.


Some tips from my experience thus far with Artisan Bread in Five Minutes a Day:

1. Cornmeal is your best friend with this technique. In the beginning, I wasn't using enough and when I would try to slide the bread or pizza off the cookie sheet and on to the hot stone, the dough would stick. I now use a liberal amount of cornmeal and I make sure the dough is near the end of the upside down cookie sheet so it doesn't have far to slide.

2. Don't be discouraged. At first, I had a hard time forming the dough into a ball. My dough balls never looked as formed as the ones in the book. The dough can be quite sticky and I think that was why I initially put the cookbook back on to the bookshelf. I think I was just dough-challenged in the beginning. I found this technique gets easier each time I bake some bread.

I'm excited to branch out and try other recipes, like Vermont Cheddar Bread, Roasted Garlic Potato Bread, Pecan Caramel Rolls, Strombolis, Soft Pretzels or the Focaccia with Onion and Rosemary...should I go on?? Okay...the Oatmeal Pumpkin Bread, Caramelized Onion and Herb Dinner Rolls, Prosciutto and Olive Oil Flat bread, Spinach Feta Bread, Sun-Dried Tomato and Parmesan Bread and so much more. I think you get the picture; the possibilities in this cookbook are endless.

There is a new version, Healthy Bread in Five Minutes a Day: 100 New Recipes Featuring Whole Grains, Fruits, Vegetables, and Gluten-Free Ingredients that I want to try.

I see a bright future and it doesn't include store-bought bread.

Do you bake your own bread? Have you read and tried the Artisan Bread in Five Minutes a Day method? Let us know in the comments.

Thanks for reading. If you would like to receive FREE updates of FBS, there are four ways to do so:
This post is linked to Works for Wednesday at We are That Family and Ultimate Recipe Swap at Life as MOM.

Affiliate Disclosure: I am an Amazon Associate, and if you make a purchase through my link, I earn a small percentage--at no cost to you! Thanks for supporting Family Balance Sheet.

Thursday, February 10, 2011

Valentine's Day Dinner Ideas


Do you celebrate Valentine's Day?

While I take pride in cooking dinner for my husband most nights, I like to make an extra special dinner for Valentine's Day. I might make a dish with pricier ingredients that I don't cook with too often. We'll have a bottle of wine and I always make a wicked dessert.

Because the restaurants will be mobbed, we usually stay home on Valentine's Day. I have pulled together some dinner ideas for you. Some from Family Balance Sheet and a few recipes that I have found over the past week at various sites. Happy Valentine's Day!
The Main Course:
The Most Important Course...DESSERT:

What are you cooking for your honey for Valentine's Day? Let us know in the comments, along with any links to the recipe.

Thanks for reading. If you would like to receive FREE updates of FBS, there are four ways to do so:


Image: AKARAKINGDOMS / FreeDigitalPhotos.net

Wednesday, February 9, 2011

How Do You Cope With The Cold Weather Blues?


I've been in a funk lately.

I'm having trouble focusing and concentrating on a particular task at hand. I've been grouchy lately and my poor husband has taken the brunt of it. I'm even getting bored with my winter meals of soups, chilies, and casseroles. Our grill is covered in ice right now and grilling when it is dark and 25 degrees outside is not that appealing either.

I'm still eating normally (for me), sleeping well and I have kept up with my exercise routine, so I'm not terribly concerned that it is a real depression. I went through a depression in my mid to late 20's that affected my appetite, sleep patterns and energy levels. Therapy and joining a gym helped me considerably back then.

Could my funk be from the weather?
The weather outside has been so cold and frigid and I feel like we haven't seen the sun in the northeast since November.

We are ready for spring. I'm starting to get gardening catalogs and my mood brightens up when I find them in my mailbox. The sun poked through for about an hour on Monday and I took my kids outside to ride their bikes on the sidewalk. It was 29 degrees.

Just looking at this picture, brings a smile to my face.


I think I'm going to start planning my gardens. I know I won't be able to plant anything for several weeks, but maybe just looking through my books and magazines will remind me that warmer days are coming.

I'm also going to spend this upcoming weekend looking through my cookbooks and Cooking Light magazines for inspiration and new ideas for my meals. It's time to change things up a bit.

I'm also going to get some 5ks and 10ks on my calendar. A college friend is trying to talk me into running a half-marathon with her in July. I haven't committed yet, but that summer goal might help me see past this cold weather too.

Are you feeling any cold weather blues? How are you coping with it? Please share any strategies with us in the comments.

Thanks for reading. If you would like to receive FREE updates of FBS, there are four ways to do so:


** I am not a medical professional, so please consult your medical professional if you feel like your 'funk' is a more serious issue.

Monday, February 7, 2011

Pasta e Fagioli


It looks like I was a little stingy with the soup in this picture. I wasn't. We all had seconds and we enjoyed leftovers the next day. This soup is DELICIOUS.

This recipe was very pleasing to my 5 year old. She asked for "more, please" which is always a good sign.

Pasta e Fagioli
adapted from Cooking Light

  • 1 Tbsp olive oil
  • 10 oz turkey sausage, casings removed. I cooked the whole 20 oz package and used half for this recipe and then put the other half in the freezer for a future meal.
  • 4 cloves garlic, minced
  • 1 cup water
  • 16 - 24 oz homemade chicken stock, or store-bought. If 16 oz makes the soup too thick for you, add more until you get to your desired consistency.
  • 1 cup roasted tomato sauce, or your favorite brand
  • 1 cup uncooked small pasta, such as seashell, but I used orzo because that was in my pantry.
  • ½ cup grated Romano or Parmesan cheese, divided
  • 1 ½ tsp dried oregano
  • ¼ tsp salt
  • ¼ tsp pepper
  • 2 cans (15 oz) cannellini or white beans, drained

In a large soup pot, heat the olive oil over medium-high heat. Add the sausage and garlic and cook until sausage is no longer pink. Stir and break up the sausage into bite-sized pieces as you cook.

Add the water, stock and tomato sauce and bring to a boil.

Add the pasta, ¼ cup cheese, oregano, salt, pepper and beans. Bring to a boil and then reduce heat to a simmer for about 8 minutes until the pasta is cooked.

Top with remainder of cheese to serve.

Goes well with a salad, homemade applesauce and homemade bread.

Side note: Next time I make this soup, I am going to add more stock. I used 2 cups and the orzo really soaked it up. My soup had a very thick consistency. Regardless, it was delicious, but I made a note to myself to add more stock next time.

Print this recipe.

Thanks for reading. If you would like to receive FREE updates of FBS, there are four ways to do so:


This post is linked to:

Wednesday, February 2, 2011

How Much Interest Is Your Debt Costing You Every Month?


Have you ever broken down your debt payments to see how much goes to your principal and how much goes to interest?

I challenge you to take a look. Look at your mortgage, your credit cards and your student loans. You will see your debts in a whole new way.

I did this exercise and realized 36% of the monthly payment we pay to my husband's student loan every month goes to interest. 36%! THAT SUCKS!

Go. Do it. Maybe it'll tick you off enough to finally take a sledgehammer to that debt. Let us know in the comments how you make out.

~~~~~~~~~~~~~~~~~~~~~~~~~~~~~~~~~~~~~~~~~~~~~~~~~~~~~~~~~

I'm taking a Road to Financial Freedom, do you want to follow along?

If you would like to receive FREE updates of FBS, there are four ways to do so:

Tuesday, February 1, 2011

Brownie Muffins: Frugal Tip or Portion Control


My husband's favorite dessert in the whole wide world is a big, fat brownie topped with raspberry ice cream. Being the loving wife that I am, I am happy to oblige.

Our problem is that when I make a pan of brownies, the pan mysteriously disappears in a matter of hours. Every time one of us walks by the pan, we cut off just one more piece. Just one tiny piece won't hurt. And that is NOT good for us or our waistline.

While Christmas shopping back in December, I noticed a Brownie pan at a home goods store with a price tag of $29.99. When I saw the pan, I thought to myself, 'that is just a glorified muffin pan'.

Light bulb moment

There was a big football game on one night so I bought our favorite brownie mix. While I love my Homemade Brownies with Homemade Whipped Cream, brownies are one item that I occasionally buy/bake/eat from a box.

I poured the brownie batter mix into my 12-muffin pan and baked for about 35 minutes. My husband would like the brownies done a little longer. He likes the crunchy sides and I don't want to feel like I'm going to break a tooth, so I compromised with 35 minutes.

Genius, now why didn't I think of this before.

After my family of 4 each had a brownie, I put the rest in a freezer bag and popped them in the freezer. And guess what, a week later, they are still in the freezer. We didn't eat them within 24 hours like we normally do.

So essentially I am killing two birds with one stone: our favorite dessert is lasting a lot longer in our home and we don't feel like we're going to bust our zippers by the end of a day.

Thanks for reading. If you would like to receive FREE updates of FBS, there are four ways to do so:
This post in linked to Frugal Friday at Life as MOM and Works for Me Wednesday at We Are That Family.