Tuesday, June 28, 2011

Welcome to My Jungle

Who would have thought 7 weeks ago, that this humble boxed garden with its new soil...


...would become such a jungle.


Or this newly planted herb garden...


would explode into this...


And silly me for worrying that I didn't know how to weave the cantaloupe vines...


...they practically do it themselves.


And my raspberries that I bought at a yard sale last summer...


...love their new location.


Somewhere in this mess are tomato plants, green beans and pepper plants.


Not for one second since May, have I regretted replacing the old soil with the new mix. I think my garden loves me for it...and the record amounts of rain that we have had is certainly helping.

How is your garden doing this summer? Let us know in the comments.

Thanks for reading. If you would like to receive FREE updates of FBS, there are four ways to do so:


This post is linked to Tuesday's Garden Party at An Oregon Cottage.

Monday, June 27, 2011

Fresh Basil Walnut Pesto


My basil plant was beginning to get out of hand.


I needed to get cracking on using it up. I knew the pesto would do the trick. It takes a lot of basil leaves to pack into 2 cups.

I mixed this pesto in with some pasta and served with grilled chicken. It was a wonderful summertime meal. The pesto would also go well with a round of homemade artisan bread. Just me, the bread and the pesto, but I think my family would get upset if I didn't share.

Fresh Basil Walnut Pesto
  • 2 cups packed fresh basil
  • 3 garlic cloves
  • ⅓ cup walnuts
  • ⅔ cup extra virgin olive oil
  • 1/4 tsp each of salt and ground pepper, or to your taste
  • ½ cup 3 cheese blend of Parmesan, Asiago and Romano. I like to buy the blend that my store offers, but you could also just use any one of these cheeses.
Place basil, garlic, walnuts, salt and pepper in a food processor. Turn on your food processor and start to slowly stream in the olive oil, stopping periodically to scrape the pesto down from the sides of the processor.

Add cheese and pulse a few times to mix well.

I used this entire batch right away by mixing in to pasta. If you want to freeze the pesto for future use, omit the cheese and place in freezer container. When ready to use, thaw the pesto and mix cheese in to the pesto.

Print recipe for Basil Walnut Pesto.

Have you made anything from your herb garden yet this year? Let us know in the comments.


Thanks for reading. If you would like to receive FREE updates of FBS, there are four ways to do so:


This post is linked to Real Food Wednesday at Kelly the Kitchen Kop.

Saturday, June 25, 2011

Merry 6 Months Until Christmas! Start Planning Today.

When the weather outside is...90+ degrees...who wants to think about Christmas?


But in reality, 6 months is not that far away. If your holiday planning went smoothly last year then you might not feel any urgency to think about Christmas 2011, but if you overspent, shopped at the last minute and paid the price well into spring then you might want to rethink this year's strategy.

Here are some questions to ponder:
  • How much did you spend last year?
  • Are you okay with that number?
  • Did you pay cash or use a credit card to buy gifts?
  • If you used a credit card, when did you pay it off?
Personally, I'm not doing so well with my planning. We usually use a credit card to buy our Christmas gifts and then pay the balance off in January. We like to earn the points, but that strategy led to some over-spending last year on gifts. We also waited too late to even start shopping, so I'm sure that didn't help with the over-spending.

I intended to set aside cash every month this year for Christmas gifts. This past January, I looked at what we spent on Christmas gifts in 2010 and reduced it by 20%. I divided that number by 12 and decided that was what we would set aside each month. It was a great strategy that first month, but I haven't been diligent enough to transfer the money to our savings account.

Hit the Restart button.
  • Make a list of your Christmas gift recipients AND other Christmas expenses, like cards, stamps, hostess gifts, decor.
  • Develop a Christmas gift budget for each person or expense on your list.
  • Add up your budget and starting today, set aside money each month.
  • Think outside the 'gift' box when it comes to gift ideas. Handmade gifts, homemade meals, home baked goods are all gifts from the heart for those hard to buy for people.
  • With 6 months to go and a list in hand, you now have time to keep your eye out for sales and clearance bargains.
Have you started planning for Christmas? Did you over spend last Christmas? Let us know in the comments.

Thanks for reading. If you would like to receive FREE updates of FBS, there are four ways to do so:


Image: Paul / FreeDigitalPhotos.net

Thursday, June 23, 2011

It Amazes Me What People Throw Away


Our trash pick-up day is Wednesday. So most of our neighbors put their trash outside on Tuesday afternoons or evenings.

We noticed the neighbor up the street had put a pink and purple tricycle out on the curb with their trash. My 3 year old already has a tricycle, but the girls and I were intrigued to see if this one was functional or broken. And as my 5 year old pointed out, "mommy, I don't have a basket on my bike." If the trike was broken, at least we could save the basket.

So we walked up the street to check out my neighbor's trash. We immediately realized that there was nothing wrong with the bike. I have a feeling my neighbor's granddaughter outgrew it, but why would you put a working trike out in the garbage? Why wouldn't you donate it to Goodwill?

I rang my neighbor's doorbell to ask their permission and they weren't home, so I took it anyway thinking that I will let them know the next time I see that they are home. As we walked away with the trike, my three year old said, "mommy, it's not awrs." I'm so proud of that girl and I explained that I will go back to tell them when they were home. My five year old will hold me to it, not to worry.

As I said, my three year old has a tricycle, but I don't think she is giving this up any time soon. We'll eventually pass it on to another neighbor who is having a baby girl in July.


This is not the first time, my neighbors have hauled perfectly good items to the curb. Last summer, a different neighbor was cleaning out their garage and put a Sears Cargo Carrier for the top of your car to the curb. We have one, but my husband went to another neighbor to tell them about it. He went to check it out and it was in perfect condition. They left for a vacation last weekend with it on top of their van.

I'm not sure what goes through people's minds when they throw things away that still have life in them. Doesn't it amaze you what people throw away?

Thanks for reading. If you would like to receive FREE updates of FBS, there are four ways to do so:

Wednesday, June 22, 2011

Batch Cooking & Freezing: Chicken Breasts for Future Meals


Meal time is starting to get more hectic around here.

As my kids get older, they are participating in more activities and for some reason they happen around our normal dinner time. I am looking for meal prep short cuts that do not sacrifice the quality of our meals, but still save myself time and maybe even some money.

I stock up on chicken breasts when the large 3 lb packages are on sale. $1.99 is my buy and stock up price. The best price I have gotten to date is $1.59/lb, but I doubt I'll see that price again, it was during a store's Grand Re-Opening.

To save myself some time I have been batch cooking the chicken breasts and freezing in 2 cups portions. Chicken in the main component in many of my dishes and eliminating the cooking part of chicken during meal prep should save me some time.

I place all of the chicken breasts from a 3 lb package in a 6-Quart crock-pot. I pour about 32 oz of homemade chicken stock on top and cooked on low for about 6-7 hours, or until it is done. (You could also use store bought chicken broth.) It is important not to over-cook, because the chicken dries out. The stock should be discarded; it will be full of foamy, fatty stuff.

When chicken is cooked all the way through, remove the chicken from the crock-pot and allow to cool slightly to the point where you can handle the chicken. You can then dice or shred into small bite-size pieces. I prefer to shred and honestly, I think it is easier to do with my clean hands than two forks. It is also much easier to shred when the chicken is still slightly warm.


Place in freezer containers and store in the freezer until future use. I like to freeze in 2 cup portions.

Another way to batch cook chicken is to Roast a Whole Chicken.

Easy meal ideas for your cooked chicken:

Do you pre-cook chicken for the freezer and future meals? If you have a recipe that includes already cooked chicken, feel free to include the link in the comments.

Thanks for reading. If you would like to receive FREE updates of FBS, there are four ways to do so:

Tuesday, June 21, 2011

How to Make Homemade Whipped Cream


Homemade Whipped Cream adds decadence to any dessert. It is a great replacement for ice cream, but quite frankly it is delightful just eaten out of the mixing bowl with a spoon.

I chose to make whipped cream recently with my Strawberry Rhubarb Crisp, because there weren't any good sales on ice cream that week and my ice cream machine is broken. The cost of homemade whipped cream can be much less than the cost of ice cream.

Homemade whipped cream
  • 1 Cup cold heavy whipping cream
  • 1 Tbsp. Confectioners sugar
  • 1 tsp. Vanilla


Pour all three ingredients into a mixing bowl. Using a wire attachment or beaters, gradually increase speed of the mixer to high and whip until soft peaks form. It only takes a minute or two.


Could that be any more simple?

Add Homemade Whipped Cream to your favorite dessert:

Do you make Homemade Whipped Cream? What are your favorite desserts that you serve with homemade whipped cream as a topping? Let us know in the comments. Feel free to include a link to your recipe.

Thanks for reading. If you would like to receive FREE updates of FBS, there are four ways to do so:

Monday, June 20, 2011

Sausage and Swiss Chard Frittata


Frittatas are so easy to whip up. They are also an opportunity to be creative and clear out your refrigerator all at once.

We received the Swiss chard in our CSA box last week and I had some breakfast sausage in the freezer that I wanted to use up. This frittata was so savory and delicious that my 5 year old asked for a second helping. And even my 3 year old, who was pretty sure she wasn't going to like it, gobbled it up.


Sausage and Swiss Chard Frittata
  • 1 Tbsp olive oil
  • ½ red onion, chopped
  • 1 garlic clove, minced
  • 1 lb sausage, casings removed. Use your favorite variety. I used turkey, breakfast sausage.
  • ½ - 1 full bunch Swiss chard, washed, dried, chopped fine.
  • 6 large eggs
  • ¾ cup Parmesan
  • ½ cup milk
  • 2 Tbsp flour
  • ¼ tsp pepper
  • ¼ tsp salt

Preheat oven to 350 degrees.

In a large skillet, heat olive oil over medium heat and add onion and sausage. Break up the sausage into tiny pieces as it cooks. Cook sausage completely. Add Swiss chard and cover. Cook to wilt in about 3 minutes. Pour sausage mixture into a 9-inch pie plate prepared with non-stick cooking spray.

In a mixing bowl, add the eggs, Parmesan, milk, flour, salt and pepper. Whisk completely. Pour over the sausage mixture in the pie plate.

Bake for 30 minutes or until eggs are set.


I served with a garden salad, fruit and fresh artisan bread.

Print recipe for Sausage and Swiss Chard Frittata.

Thanks for reading. If you would like to receive FREE updates of FBS, there are four ways to do so:


This post is linked to $5 Dinner Challenge and Tasty Tuesday and Real Food Wednesday at Kelly the Kitchen Kop.

Wednesday, June 15, 2011

25 lbs of FREE Flour and Why You Should Always Pay Attention at The Check-Out


I learned a very valuable lesson at the grocery store yesterday.

I had flour on my shopping list. I blew through the ..99/5 lb flour that I stocked up on at Christmas time and I haven't been able to buy it at that price ever since. As I was about to pick up a 5 lb sack of flour yesterday (at regular price), I noticed that the 25 lb bags were being discontinued and the price per pound was .314, not the .198 from Christmas, but way better than what the 5 lb bags are priced at currently.

But where was I going to store 25 lbs of flour? All I could think of was my husband rolling his eyes when he sees this crazy bag. I stored the 5 lb sacks that I bought in December in the freezer and that worked out well, but I would need some kind of container for this 25 lb bag to keep it in the freezer.http://www.blogger.com/img/blank.gif

I then remembered some of the comments from back in December and a reader told me to go to the bakery dept of the grocery store and ask for a food grade container that they might be throwing away.


The bakery dept gladly gave me this frosting container and even offered me more. Problem solved.

So where does the lesson come in? I proceeded to check out and I just happened to notice the price of the flour scanned at $8.49, not the $7.85 that was listed on the shelf. I told the cashier and the friendly kid bagging my groceries offered to go check the price for us. He came back and confirmed the $7.85. I assumed the cashier would just give me the $7.85, but she called her manager and the manager gave me the flour for FREE. Apparently, their policy is your item is free if the scanned price doesn't match the sale price.

I thanked the manager, the cashier and the bagger and off I went with my crazy bag of FREE flour.

When I got home, I cleaned my free container and poured in the flour and filled up my pantry flour container. I won't lie to you that there wasn't a minor mess. I rearranged my freezer and the new container fit right in. Although, it is probably a good thing that I haven't started to freeze any of my garden harvest yet.

So the moral of this story is to pay attention as your food is being scanned at the grocery store. If I would have waited to look at the receipt when I got home, I never would have gone back to the store for a .64 correction, but because I noticed it at the store, I got it for FREE...along with my container to store it in.

Does you grocery store have this policy? Have you ever found a mistake and gotten the food for free?

Thanks for reading. If you would like to receive FREE updates of FBS, there are four ways to do so:


This post is linked to Frugal Friday at Life as MOM.

Monday, June 13, 2011

Strawberry Rhubarb Crisp


With fresh berries from last week's trip to the U-Pick strawberry patch and the rhubarb from my very own garden, I baked the most delightful summer dessert this past weekend. If you are unfamiliar with rhubarb, it is a very tart vegetable that masquerades as a fruit in summer desserts. The sweet strawberries and the tart rhubarb blend well together, but the dessert definitely needs to be paired with your favorite ice cream or whipped topping. My favorite is homemade whipped cream. Enjoy!

Strawberry Rhubarb Crisp

Fruit
  • 3 cups sliced strawberries
  • 3 cups sliced rhubarb
  • ¾ cup sugar
  • 3 Tbsp cornstarch
  • juice of 1 lemon

Crisp
  • ½ cup brown sugar
  • ¾ cup flour
  • ½ cup (1 stick) cold butter, cut into small pieces
  • ¾ cup oats
  • ½ tsp cinnamon
In a large bowl, mix together the strawberries, rhubarb, sugar, cornstarch and lemon juice. Pour into a 11 X 7 baking dish prepared with non-stick spray.

In a separate bowl, combine the brown sugar, flour and butter until the mixture is crumbly. A clean hand or a pastry blender make this easy. Stir in oats and cinnamon. Sprinkle the crisp mixture on top of the fruit.

Bake at 375 degrees for 40 - 50 minutes or until fruit is bubbly and the crisp is golden browned.


What are baking from your garden?

Print recipe for Strawberry Rhubarb Crisp.

http://www.blogger.com/img/blank.gif
Thanks for reading. If you would like to receive FREE updates of FBS, there are four ways to do so:

This post is linked to $5 Dinner Challenge and Tasty Tuesday at Balancing Beauty and Bedlam and Tuesday's Garden Party at An Oregon Cottage and Real Food Wednesday at Kelly the Kitchen Kop and Ultimate Recipe Swap at Life as MOM.

Thursday, June 9, 2011

How Do You Make Strawberry Shortcake?


Finally, this year's strawberry season has hit central Pennsylvania. I was getting a little antsy as it is about 2 weeks later than usual. Strawberry season is like Christmas for your taste buds. For 3 glorious weeks we don't have to buy strawberries trucked in from California at the grocery store. Instead we head to the local U-Pick strawberry patch where the berries are brilliant red and taste divine.

I headed out yesterday morning around 10 with my girls. They were gung ho at first to pick the berries, but that tapered off quickly as the sun started to blaze. "Mommy, I'm hawt", "Mommy, I firsty", cried my flushed three year old. So I opened the doors of the van and they sat with their legs dangling out the back door as I quickly picked a 4-qt box. Far from my normal 16 quarts that I usually pick every year. But I was melting too, so I will try to go back without the kids this weekend.

Four quarts of fresh, local berries will be eaten very quickly at our house. I'm not even going to bother making jam with it or even try to freeze them. We'll be eating strawberries for breakfast, lunch and dinner until they are gone.

You won't find me cooking too much from a box mix here on Family Balance Sheet, but nothing conjures up sweet childhood memories than shortcake made with Bisquick. It is how my grandmother made shortcake, my mother and now myself. The simple recipe is on the box and it includes the Bisquick, sugar, melted butter and milk.


MMMMMM...the shortcake is covered with strawberries and cold milk and I enjoyed every single bite.


How do you make strawberry shortcake? Let us know in the comments. If you are a blogger, please include a link to your recipe.

Thanks for reading. If you would like to receive FREE updates of FBS, there are four ways to do so:

Wednesday, June 8, 2011

Do You Have A Summer Routine?

Does life change drastically for you in the summer?


This is our first official week of summer break. Life changes in a good way for us in the summer. We don't have to follow any real schedule, except the one that we make for ourselves.

But there is so much that I want to accomplish this summer: the girls will need entertained, I am training to run my first half-marathon in October and I have some writing projects that I want to pursue.

I also have a garden that needs nurtured, a house that needs maintained, a balance sheet that needs managed, a blog that I am trying to grow, rooms that need painted, and last, but certainly not least my obligations to our small business that cannot be ignored.

I need to find a balance between enjoying and packing as much fun into our summer and meeting all of my obligations as a mom, wife, and small business owner. I want to develop a summer routine for myself, so that the summer doesn't get ahead of me and nothing gets accomplished.

I'm going to start by focusing on my favorite time of the day in the summer - the early morning, before the kids are out of bed. I head out the door around 6:15 for a run and then work on my computer until the kids wake up. They are sleepy heads in the summer and roll out of bed around 9am.

The rest of the day needs a little work as I get distracted very easily, by just about anything outdoor related.

Does life change dramatically for you in the summer? Do you have a summer routine to help you fit everything in? Let us know in the comments.

Thanks for reading. If you would like to receive FREE updates of FBS, there are four ways to do so:

Tuesday, June 7, 2011

Vertical Gardening

Homegrown cantaloupe tastes better than candy. It is my most favorite plant to grow in my garden, but the last two years, they have taken over my small little garden box and spilled into my yard.


I was nearly panicked to think of a summer without growing cantaloupes, but I just didn't know where I was going to plant them.

Enter the Square Foot Gardening method.

Last summer, I converted my 4 X 8 box to a Square Foot Garden and I was very pleased with the results. This year, I decided to follow the book's directions to build a vertical trellis to grow my cantaloupes up instead of out and all over my yard.


The above trellis cost me about $20 and was very easy to build. My frame is made of three 5-foot conduit pipes(1/2 inch diameter), two 18 inch long rebar (1/2 inch diameter), two elbow connectors and trellis netting. The only variance that I made is that my trellis is 5 X 5 and the book recommends 4 X 5; I just didn't feel like sawing one of the 5-foot pipes down to 4 foot. Hopefully, that wasn't an error. Because of my past experience with unruly cantaloupe plants, I planted 2 plants, instead of one per square foot. I'll test the waters this year to see how many my trellis can handle.

I planted the melons about 2 1/2 weeks ago and they are just starting to take off. They're not quite long enough yet to weave, but with all of the sun that we have finally been getting, they'll be shooting upward soon. I'll post more pictures through out the season to show the progress.


What kind of trellis/system do you use to plant vertically? Let us know in the comments.

This post is linked to Tuesday Garden Party at an Oregon Cottage.


Thanks for reading. If you would like to receive FREE updates of FBS, there are four ways to do so:


Disclosure - This post contains affiliate links that help support this site at no additional cost to you. Thank you for supporting Family Balance Sheet! You can read the site's full disclosure here.

Monday, June 6, 2011

Slow Cooker Asian Orange Chicken Thighs and Drumsticks


I don't use my slow cooker as much as I should. It is definitely an under-used appliance in my kitchen. I had some chicken thighs and drumsticks in the freezer that needed to be used up, so I dusted off my slow cooker and we had one delicious dinner.

Slow Cooker Asian Orange Chicken Thighs and Drumsticks

  • ½ cup homemade chicken stock, or store bought
  • ½ cup soy sauce
  • ⅓ cup cider vinegar
  • ⅔ cup honey
  • zest & juice from one orange, or about ¼ cup orange juice
  • 3 garlic cloves, minced
  • 1 tsp ground ginger
  • 4 pounds chicken thighs and/or drumsticks

Mix together all of the ingredients, except the chicken, in a bowl. Place chicken in slow cooker. Pour orange mixture over chicken. Cook on low for 6-8 hours until done.

I served with Jasmine rice and steamed broccoli. Enjoy!

Print recipe for Slow Cooker Asian Orange Chicken Thighs and Drumsticks.

Thanks for reading. If you would like to receive FREE updates of FBS, there are four ways to do so:


This post is linked to $5 Dinner Challenge and Tasty Tuesday at Balancing Beauty and Bedlam and Ultimate Recipe Swap at Life as MOM.

Friday, June 3, 2011

9 Inexpensive Activities To Keep Your Kids Entertained This Summer


School's out for the summer and now mom has to entertain two kids who get bored very easily.

I know my kids have plenty to do around our house, but the same toys, bikes, books and swing set can get boring after just a few weeks spent at home.

I need to have a game plan for summer activities and they need to be fun, affordable and last longer than 10 minutes.

Here's Nine Ideas To Help Keep Our Monkeys Entertained This Summer:

1. Check out your local library and book stores for their summer reading programs. At our library, the kids can earn small prizes, such as free coupons for pizza and ice cream for reading books through out the summer. They also have a summer schedule for special story times and other activities. A side bonus, our local bank is offering the children $10 for reading just 10 books over the summer.

2. Look for local fairs and festivals for low cost games, food and activities. We love to hit the local harvest festivals in the summer time for strawberries, peaches, and apples. Local towns, libraries, malls and fire halls also host carnivals and festivals as fundraisers. Keep your eyes and ears open for local activities.

3. A Park A Week – One day each week, my kids and I try a different park. I don’t mind driving a few extra miles to try a new park, since it keeps them from getting bored with the same park every week. We pack a lunch, snacks, drinks and sunscreen and head out early in the morning to avoid the hot afternoon sun.

4. Hit the amusement parks in the late afternoon and save considerably on the admission fee. We live near a huge amusement park that is a bit pricey. A whole day at a big amusement park would be too long for my three year old, so we go after 5pm when the price reduces considerably and it is much cooler than at mid-day.

5. Host a theme party. Invite your friends over for an ice cream social or a banana split party. On nice evenings, my hubby starts a bonfire and we invite the neighbors over for s'mores for the kids and Coronas with lime for the adults.

6. My kids will be participating at our church's Vacation Bible School(VBS) this month. It is a week long morning camp with a biblical focus and plenty of fun activities, games, snacks, crafts, and music. Many churches will be starting to advertise their VBS is the upcoming weeks. It usually runs Monday through Friday in the mornings or in the evenings. It is also usually free and open to the community as most churches welcome non-members.

7. Check out your local movie theaters for their summer time specials. A theater in my area offers a FREE showing of Rated G movies on Tuesdays and a FREE showing of Rated PG movies on Wednesdays starting in June.

8. As the above picture depicts, one of my kids' favorite things to do in the summer is run and play in the sprinkler. That Elmo sprinkler was the best 50 cents I have ever spent at a yard sale.

9. If you are stumped for ideas, check out this list to see if your city was included in Staycation Ideas From All Across the Country.

What inexpensive activities do you have lined up for your family this summer? Please share your ideas in the comments.


Thanks for reading. If you would like to receive FREE updates of FBS, there are four ways to do so:

Wednesday, June 1, 2011

Eight Tips To Help You Save Money While On Vacation


Summer is here and for many people it is time for a much needed vacation. Whether you are taking a 'staycation' or a 'gocation', as someone recently called it on Twitter, we all need some time to recharge, connect with family and let stress melt away.

Vacations are supposed to be enjoyable. We save and eagerly wait all year for our vacation and the last thing that we want to do is stress about the money spent while on our trip.

A little pre-vacation planning will help you save money while on your trip, so that you can have the relaxed vacation that you hoped for.

1. Make a list of expenditures.
Of course, your planning starts with where you are going. How long is your travel time to your destination and how are you getting there? Are you staying in a hotel, a rental or with family? Does your rental have a kitchen? Will you have laundry facilities? How much can you pack in your vehicle? Are there reliable grocery stores at your destination? Brainstorm all of the expenditures that you will have and make a list.

2. Create A Budget For Your Trip.
Everyone’s vacation destination and expectations will be different. Maybe you don’t want to cook at all during your vacation or maybe eating out for every meal is beyond what your budget can handle. What activities will be available where you are going? How much gas do you think you will need to get to your destination?

3. Use Cash
I like to use cash while on vacation, because I am less tempted to buy useless souvenirs and over spend with a credit card, but it takes a little planning to come up with the cash that we need. Some of our ideas:
  • We have a yard sale every spring and use that cash for our vacation.
  • We also keep a change jar in the kitchen that accumulates quickly through out the year.
  • My parents don't spend any $1 bills that pass through their hands through out the year. They save them up for their vacation.
What are some ways that you save up extra cash for vacations?

4. Create a Meal Plan.
Every summer, we travel with my parents to the beach. Our rental has a kitchen, so my mom and I sit down before the trip and talk about a meal plan.

We calculate the number of meals we are going to have and decide how many will be at home and how often we will dine out. We include breakfasts, lunches, dinners and snacks in our planning. My mom and I are each responsible for 2 dinners. We usually plan for one night to be ‘clean out the fridge’ night and we allow for 3 dinners out. Most of our breakfasts and lunches are eaten in and we keep it simple with cereal and eggs for breakfast and sandwiches for lunch.

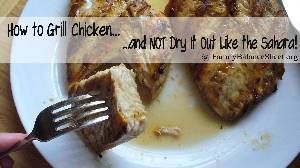
I plan our menu weeks before we leave, so I'm able to take advantage of store sales and I do much of the food shopping ahead of time. Our rental has a grill so I usually grill chicken and turkey burgers for my two nights. My mom usually brings a meatloaf and soup/salad for her two nights. We both freeze our dinners at home and they hold up well in the coolers on our trip.

If you are traveling with other families, splitting the menu planning will save you money and also give you a night off when it is someone else's turn in the kitchen. Yeah, for nights off!

Be sure to discuss each family’s food challenges.

5.What Are Your Non-Food Needs?
Being prepared ahead of time will save you money and time. Many of these items will be cheaper if bought at home than on your vacation.
  • Will you need to supply your own: toilet paper, bath towels, bed linens.
  • Will there be laundry facilities? Detergent is much cheaper when bought at home on sale.
  • Drinking water. At our vacation spot, it is recommended to not drink the water out of the faucet, so we take a lot of water. It is the one time of year that I buy individual water bottles, but we also bring gallons jugs. (Thank goodness our rental had recycling containers)
  • What will you need in the kitchen? dishwasher detergent, dish soap, paper towels, napkins
  • Will you need sunscreen, bug spray?
  • Don't forget batteries for the cameras.

6. Plan for your travel.
To save money and to avoid fast food, we pack our lunch, snacks and drinks for our trip. We have a 7 hour drive to our usual summer destination, so I pack a lot of snacks and drinks and I try to keep them healthy.

Also plan for gas, tolls and parking.

7. Tourism Centers
Once you are at your destination and are settled in, find the local tourism center to scout out any coupon books. Many local businesses have these books as well. The books usually include coupons for local restaurants, stores and activities.

8. Choose Your Indulgences Wisely.
It is your vacation, so I believe a little indulgence is needed. I am a foodie and our family's chief cook. My preferred indulgence is food, so when I am on vacation, I want to eat some really good food, but have someone else prepare it for me. I don’t mind cooking and eating in a few nights so that we have some extra cash for a really good, quality meal.

My family loves crab legs and a few years ago, we discovered that it was a lot cheaper to buy the crab legs in bulk at a little road side seafood shack than a restaurant. They were cooked to perfection and we ate them on the deck of our rental. Ask the locals for their favorite restaurants. You might find little known gems that offer great food and great prices.

One year we were finding that nightly trips to get ice cream cones were eating up a lot of our cash. We bought some ice cream and cones at a grocery store near our rental and my kids were just as happy. They just wanted ice cream, they didn't care where it came from and we ended up saving some money.

How do you save money while on your vacation? What do you like to indulge in? Let us know in the comments.

Thanks for reading. If you would like to receive FREE updates of FBS, there are four ways to do so: